Securing your website for free with Cloudflare Workers and Security Headers
Published May 01, 2021 by Danny Moran
Table of Contents
Introduction
This blog is currently hosted on Cloudflare Pages which means I have no control over the webserver settings or the ability to push customer headers with my webpages when someone visits the blog.
To get around this I have put a Cloudflare Worker in front of my blog so whenever someone requests a URL the worker amends the headers and returns my custom config. This all happens in less than 1ms. For my use case, this doesn’t cost me anything as my site gets under 100k requests per day which enables me to use their free tier.
Prerequisites for setting up Cloudflare Workers
To be able to do this you need to have your DNS controlled by Cloudflare, the subdomain for your site proxied, and a Cloudflare Workers domain configured. Everything in this post can be completed using the free tier.
How much do Cloudflare Workers cost
Cloudflare Workers have a free tier, which is what I am using, which allows 100,000 requests per day. If your website is serving more requests than this per day, you will have to upgrade to the paid tier which costs $0.50/million requests per month.
How to set up your Cloudflare Worker to add security headers in under 5 minutes
The first thing you want to do is log in to your Cloudflare account and navigate to the Workers page.
Create a new worker and give it the following Javascript code.
addEventListener('fetch', event => {
	event.respondWith(handleRequest(event.request))
})

async function handleRequest(request) {

	let originalResponse = await fetch(request)

	let response = new Response(originalResponse.body,originalResponse);

	response.headers.set("X-Frame-Options", "DENY");
	response.headers.set("X-Xss-Protection", "1; mode=block");
	response.headers.set("X-Content-Type-Options", "nosniff");
	response.headers.set("Referrer-Policy","strict-origin-when-cross-origin");
	response.headers.set("Content-Security-Policy","YOUR CONTENT SECURITY POLICY GOES HERE");
	response.headers.set("Feature-Policy","accelerometer 'none'; camera 'none'; geolocation 'none'; gyroscope 'none'; magnetometer 'none'; microphone 'none'; payment 'none'; usb 'none'");
	response.headers.set("Permissions-Policy","accelerometer=(), camera=(), geolocation=(), gyroscope=(), magnetometer=(), microphone=(), payment=(), usb=(), interest-cohort=()");

	return response
}
Edit the Content-Security-Policy and give it your own CSP.
Further down in the blog post, there is information on how to create a contact security policy with resources to assist with getting it set up correctly without impacting your website.
Once you have created and deployed your Cloudflare Worker, head over to your DNS settings for your domain and go to the Workers tab.
In the Workers tab, press Add Route.
For the Route use the URL of your website. For example, this is the Route I am using: https://www.dannymoran.com/*
For the Worker, select the Worker you just created.
Select “Request limit failure mode” and select the failure mode you want to use.
- Fail closed (block): Additional requests will return an error page to your users. We recommend this option if your Worker does security checks.
- Fail open (proceed): Additional requests will bypass your Worker and proceed to your origin.
If you are using the free tier of Cloudflare Workers, remember you are limited to 100k Worker requests per day.
Press Save.
After saving your Cloudflare Worker, it will be live and adding the security headers to your website within a few seconds.
Head over to your website and do a hard refresh (Control + F5) and make sure that everything loads correctly.
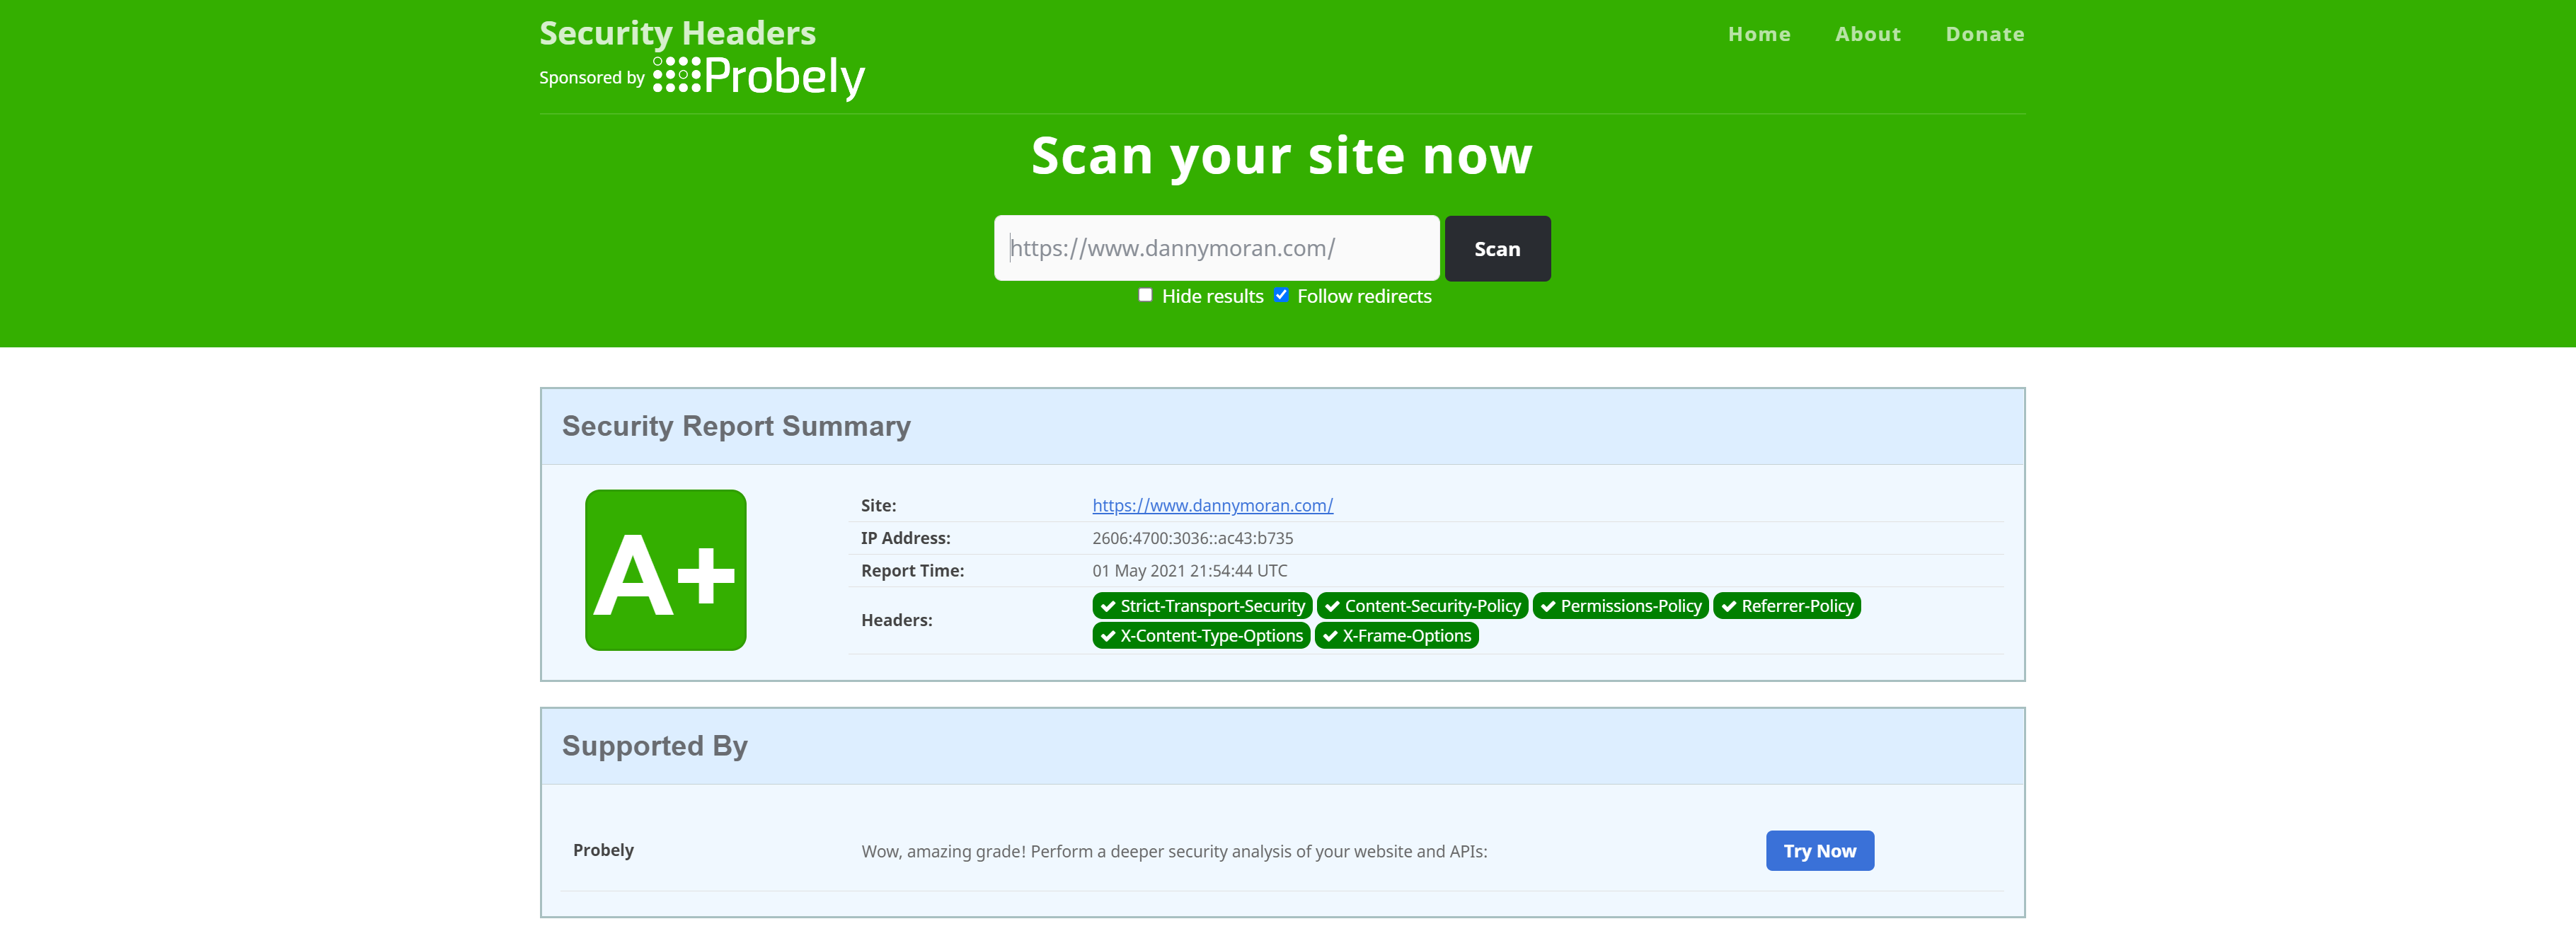
Head over to securityheaders.com and do another check on your website and it should pass with an A+ rating.
Setting up your Content Security Policy (CSP)
To set up my CSP, I used a CSP Wizard tool, which enabled me to make sure that everything was covered correctly in my CSP. The wizard can be run in a “test mode” which enables you to be able to implement and test the CSP and make sure there are no errors before changing the mode from test to live so you can be confident that nothing on your website will break by implementing a CSP.
Conclusion
This custom code gives me an A+ security rating on securityheaders.com and enables me to have the following policies configured on my website:
- Content Security Policy
- Feature Policy / Permissions Policy
- Referrer Policy
- XSS Protection
- X Frame Options
- X Content Type